Printmaking in the Arctic
February 24, 2021 By: Dara Vandor
THE ORIGINS OF PRINTMAKING
Printmaking is a process based on the transference of images or text from a matrix onto another surface, typically paper or fabric. The process of duplicating images has been credited to the Sumerians, with the earliest examples dating back to 3000 BCE. The Sumerians first conceived of the idea of engraving inscriptions and designs onto cylinders, which could then be rolled over soft clay tablets to leave a relief impression, like an early, more rudimentary printing press.
The Chinese and Japanese were known to use a rubbing technique to produce prints. The oldest confirmed example of a printed text is The Diamond Sutra, a Buddhist text dated to 868 AD. Within 100 years, the Chinese had begun using wood block printing to mass produce texts, and by 1041 had invented movable type using baked clay.
In Europe, stamping preceded printing, but was used mainly for repetitive designs on textiles, beginning around the 6th century. The rise of printmaking is inextricably linked to the production and availability of paper, which began to be produced in quantity in Europe by the end of the 14th century. The first European prints on paper are believed to be playing cards, which are referenced in a German document in 1402. The first extant art print from Europe is the 1418 “Madonna with Four Virgin Saints in a Garden.” Printmaking boomed in the mid-15thcentury, allowing for an unprecedented and widespread access to images. This impact cannot be overstated, as images had previously belonged only to the clergy and the very wealthy. Hundreds or thousands of identical images could be made from a single matrix, granting access to even the poorest segments of society. By 1450, Johannes Gutenberg had produced the printing press, which was to further the spread of knowledge in the Renaissance, Reformation and Scientific Revolution.
PRINTMAKING IN THE ARCTIC
Printmaking was introduced in the Arctic by James Houston, an artist and Government of Canada administrator. Tasked with exploring projects that might supplement the incomes of Inuit communities in the wake of the decline of the fur trade, Houston quickly recognized the potential of Inuit art. In 1957, Houston introduced artists at Kinngait (Cape Dorset) to printmaking techniques, setting up a studio with printing equipment. While the artform has little precedent in Inuit culture, it has been noted that “there are affinities with incised carvings on bone or antler, women’s facial tattoo marks, or inlay skin work on clothing, mitts and footwear.” Stone, bone, ivory, antler and wood can be found in the Arctic, but paper was nonexistent until its introduction by European explorers.
Houston travelled to Japan in 1958 to enhance his own skills, studying under the master printer Un’ichi Hiratsuka. He returned to the Arctic with new techniques and practices, which he in turn taught to local artists. The first prints were released to market in 1959. Their success led to the establishment of printing studios in Pangniqtuuq (Pangnirtung), Qamani’tuaq (Baker Lake), Povungnituk and Ulukhaktok (Holman). Print collections continue to be released annually in controlled editions. Early portfolios were issued in editions of 30, while today an edition of 50 is more common.
PRINTMAKING TECHNIQUES
Four main techniques are commonly used in printmaking: engraving, etching, stonecut and lithography.

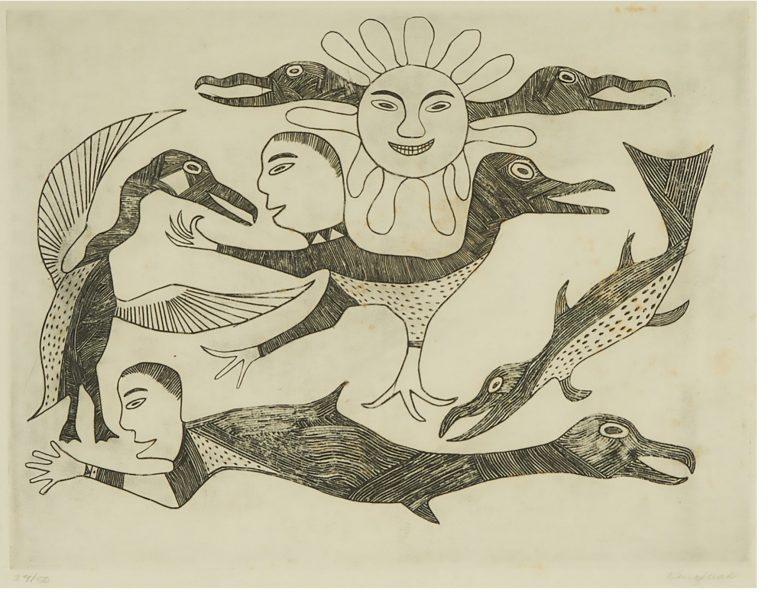
Engraving, 1962. 39/50. 8.75 x 11.75 in — 22.2 x 29.8 cm.
Engraving:
Developed in the Middle Ages, engraving is one of the oldest printmaking processes in the West. Engraving belongs to the intaglio family of printing, which means that a design is incised or engraved into a material. The artist carves their design directly into a metal plate made of copper or zinc using a sharp tool known as a burin. Burins have a sharp, diamond-shaped tip which allows a deeper line to be incised with an increase of pressure. As a cut finishes, the line thins, similar to the mark left by a quill pen. This thick to thin capability is what helps create tone in an engraving. Deeper grooves will hold more ink, resulting in a darker line. Shading is also achieved through hatching and crosshatching. Curved lines are made not by moving the burin, but by turning the plate while moving the burin straight ahead, which is why strength and control are paramount in making an engraving.
Once a composition is complete, ink will be gently spread across the surface of the plate and into the grooves, with any excess being removed with a soft cloth. A moistened piece of paper is laid on top of the plate and rolled through a press, forcing the ink out of the recessed areas and onto the paper. Once complete, the engraving will appear in reverse of the original on the plate.

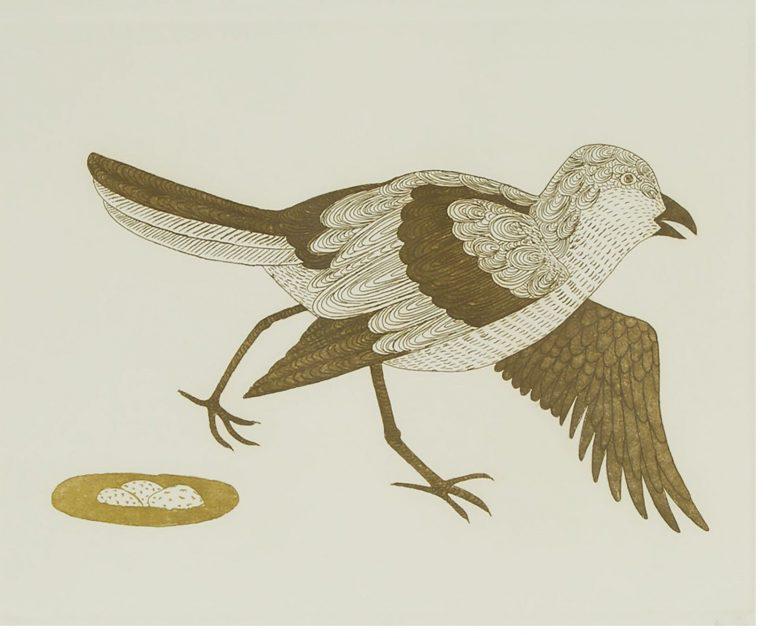
Etching and aquatint, 1982, 25/25
7.75 x 9.75 in — 19.7 x 24.8 cm
Etching:
Etching also belong to the intaglio family of printing, but relies on a chemical process rather than strength. Created in the 1500s, etching is a more fluid process than engraving. To make an etching, a smooth metal plate is first covered with a waxy layer known as the ground. A sharp tool known as an etching needle is used to scrape a design onto the ground, exposing the metal below. The plate is then submerged into an acid batch which eats away at the uncovered metal, deepening the recesses which will hold ink during the printing process. Longer submersions into the acid will create more substantial pits, resulting in darker printed lines. Unlike a burin, the etching needle generally creates a line of consistent thickness from start to finish. Etching allows artists to create a nuanced tonal palette, as darker tones can be created by repeated exposure to acid while lighter areas can be protected by re-covering them with ground.
Before printing, the ground will be removed with a solvent. Ink will then be gently spread across the surface of the plate and into the grooves, with any excess being removed with a soft cloth. A moistened piece of paper is laid on top of the plate and rolled through a press, forcing the ink out of the recessed areas and onto the paper. Once complete, the etching will appear in reverse of the original on the plate.

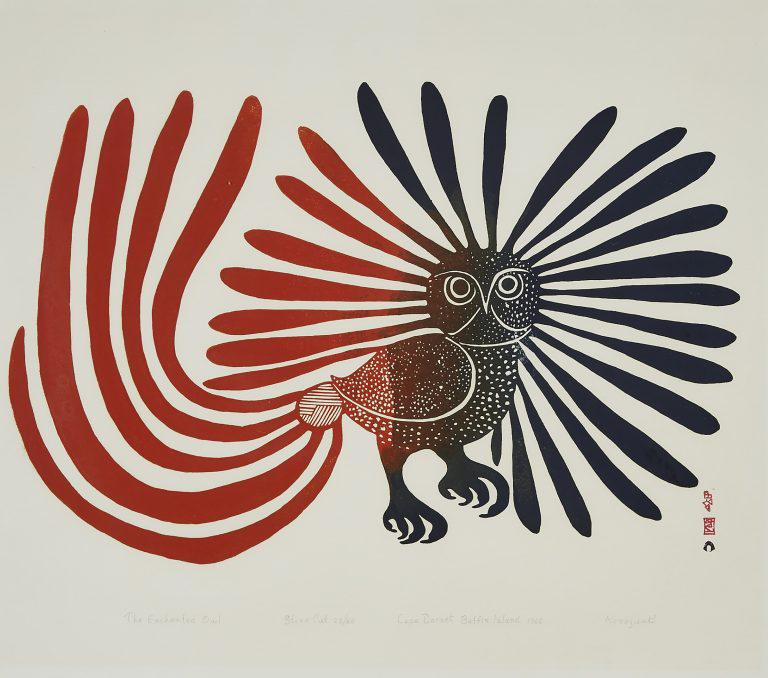
Stonecut, 1960. 23/50
21.75 x 24.75 in — 55.2 x 62.9 cm
Stonecut:
Before making a stonecut, the artist will draw a design on paper. The drawing is then transferred or inked onto a smooth stone surface. Areas that are intended to be blank in the final print are cut away, leaving a raised surface. The raised area will be inked using rollers before a sheet of paper is laid on top of the inked surface. The paper is rubbed or pressed in order to absorb as much ink as possible. The stone must be re-inked between each impression, which requires time and patience. Once complete, the stonecut will appear in reverse of the original on the plate. After an edition is complete, the printmaker will grind the stone block flat, readying it for the next design.
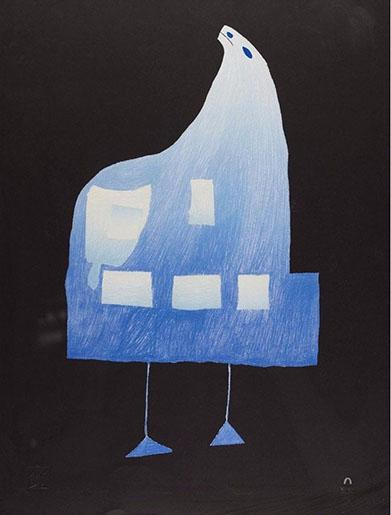
Lithography
Unlike etching and engraving, lithography is a planographic printmaking process. The term “lithograph” comes from the Greek words “lithos” meaning stones and “graphien” meaning “to write.” Lithography is based on the idea that oil and water cannot mix when they come into contact with each other.
Designs are drawn onto a flat stone or prepared metal plate using an oil-based crayon or ink. A specialized treatment is laid onto the stone, fixing the oil-based image into place. The blank areas will attract moisture and repel the lithographic ink, while the drawn-on areas will hold the ink. Water is spread onto the unpainted areas to prevent smearing. The stone is inked, paper is laid on top, and the plate passes through a press. Once complete, the etching will appear in reverse of the original on the plate.
Great examples of Inuit Engravings can be found here.

Lithograph, 1999, 26/50.
22″ x 30.5″ — 55.9 x 77.5 cm.


